Showing posts with label knitting. Show all posts

Wednesday, November 25, 2015

Indie Designer GAL - reporting day 5

We are coming up to the end of the discounts. The 25% discounts (with the coupon code giftalong2015) end this Friday.
With this in mind, I will get right to my final grouping of patterns picks.
Let’s start with Karen Robinson. Karen’s bundle is filled with cables, lace, and twisted stitches all of which are cleverly combined to form hats, shawls, and cowls. My favorite has got to be Blanchefleur. Love the story, love the lace, love the red!!
Blanchefleur by Karen Robinson
As an aside, I must say I found it prudent to not look away from Karen’s “Don’t Blink Illusion”…if you know what I mean. ;)
I have had so much fun just reading the names of C.C. Almon’s patterns. The references to Doctor Who and Firefly are just so clever! I think my favorite pattern name can be attributed to River Tam…“Also, I Wan Kill You with My Brain.” I miss Firefly.
My favorite pattern, though, conjures up standing stones and kilted warriors. I really like the cables and button finishing of The Lady of Lallybroch socks. Nice job, C.C.!
The Lady of Lallybroch by C.C. Almon

The stranded/colorwork pick today is a delightful pair of lightweight damask-inspired hand warmers by Ella Austin. Leighton House Handwarmers.
Leighton House Handwarmers by Ella Austin
These just seem so delicate and lovely.

Winter's Edge by Varian Brandon
The choice of my own pattern falls to Winter’s Edge which is worked with three colors of lace weight yarn help double. A simple stranded cowl that is light, soft, and also warm. Nice combo. 
That’s it from me. You can find my entire bundle here.
Hope you have enjoyed these daily selections…and I hope you have found some wonderful patterns to fill your knitting hours.

Friday, November 20, 2015

New Adventure - Periscope!

I have been a having a great time creating Periscope broadcasts.

What is Periscope? 


Image being able to receive a video broadcast directly from another location live..

"That's just live television," you might say.

What if you had the ability to communicate directly with the presenter. To reply to their "Good Morning!" with a good wish of your own. To ask questions about what they are talking about...live...not in a comment section to be read later?

From what I can gather, Periscope was originally designed to take the viewer a little closer to where the sender is...to experience parasailing through the helmet cam of the sailor...while he is sailing! To view the Macy's parade live and to be able to ask the sender to questions about the floats.

Ok, fine, you say...but this is a knitting blog, what does it have to do with watching a parade?

The cool thing is a number of creative people are using Periscope to short broadcasts about craft related things. 

Here are some examples..

Ann Tudor, glass artist...sits in front of her oxygen touch and creates adorable glass objects....including hummingbirds, fancy fish, and even holiday stitch markers 

Kathleen Dames, an incredible sweater designer out of NYC...talks about her designs and offers tips and techniques for knitting her sweaters...and knitting in general.

Joeli of Joeli's Kitchen, a tech editor and designer, talks about knitting in general, tech editing and offers advice to new designers.

These are just to name a few.

...and where am I on Periscope? You can find me @vbknits. What do I talk about...stranded colorwork...what else!

So how do you join us? Download the Periscope app on your smart phone to be able to comment live....or go to the links above and watch the replays.

Please join me! I "scope" most weekdays except Wednesday usually between 10 and 11AM eastern. I'd love to say hello...live!


Brandon Knitting Designs - website
Brandon Knitting Designs - Facebook
Ravelry - varianbrandon
Twitter - @vbknits
Pinterest - Varian Brandon
Instagram - varianbrandon
Periscope - @vbknits


Tuesday, May 26, 2015

Stranded Knitting: Post 3 - Gauge/Tension

Gauge…or Tension
Wildflower swatch

The strands…or floats…across the back of the work also help to even out the overall dimensions of the individual stitch…changing the stitch silhouette from rectangular to more square in shape. In other words, your stitch gauge and your row gauge will be almost, if not exactly, equal. Putting it yet another way, there is no need for knitter’s graph paper when charting out a stranded pattern. Regular square graph paper will do.

You may have noticed a difference in your gauge/tension when working on different types of needles. This is also true with stranded knitting. We’ll talk more about needles later.

Something else to watch for is the difference in gauge/tension between plain knitting and stranded knitting. This is especially important when working on project which includes plain stockinette combined with stranded work…like a stranded yoke sweater. For this reason, it might be necessary to change needles sizes between the plain stockinette and the stranded work. Most knitters, who have a difference, are tighter with the stranded work…so the plain knitting is worked on a smaller needle than the stranded knitting. But check your own gauge and see if your knitting falls into this category.

Also, a tighter gauge is generally preferred in stranded patterning. This practice helps to prevent the stranded floats across the back from peeking through to the patterning on the front….and makes a warmer fabric.

Ok, here’s my cautionary tale about gauge:

After my first introduction to stranded knitting, I was so blown away with the technique that I brought every Alice Starmore book I could put my hands on. When The Celtic Collection came out, I could not get wait to get started. Obvious to Shetland yarn…fingering weight or otherwise…or that silly little thing called gauge, I decided to tackle Erin.

At that time, there was a Yarns Brunswick mill/outlet an hour or so from where I lived which had a huge selection of the various lines of yarn spun on site. Soon I was wandering around selecting yarn…by color only, not by weight or fiber content. Thankfully, the aisle with the best color selection contained sport weight yarn which was reasonably close to the fingering weight the pattern called for. Even so, I could not find all of the colors in wool…so I substituted a silkened cotton yarn for two of the colors. Yeah, I know.

Choosing the 38”-40” size (there are only two choses), I cast on…so excited.

The pattern has 3 panels of these fabulous Celtic dogs marching around broken up with 3 gorgeously shaded Celtic knot panels…placing the knot panels at the shoulder. Part way through the third dog panel, my sweater was 23” long…the length called for in the pattern. But I hadn’t finished the third dog panel and was nowhere near the third knot panel for the shoulder. Not wanting a tunic, I stopped…cutting the poor third dog off at the knees!

Erin front. Note the dog legs at shoulder. Can you pick out the cotton yarn?

Erin shoulder seam. Note morphed dog legs.
Somehow I finished the thing.

The sweater I was aiming for: 3 dog panels, 3 knot panels, 40” circumference, 18.5” sleeves,
Gauge: 16 sts and 19 rnds in 2 inches.
The sweater I ended up with: 2.75 dog panels, 2 knot panels, 48.5” circumference, 19” sleeves. Gauge: 13.5 sts and 14 rnds in 2 inches.

It was the ‘80’s when big sweaters ruled…but that was a bit ridiculous.

Bottom line: check your gauge!

Gauge or Tension Swatches
To avoid this same or similar misadventure, a gauge swatch will have to be worked to determine the number of stitches and rounds per inch. Although this is sometimes referred to as the “dreaded gauge swatch”, finding out what your gauge/tension is BEFORE you work an entire garment will save a lot of heartache...and hugely malformed outcomes. You all know this. I will spare you the lecture.

As I’m sure you are also aware…gauge swatches need to be a good size. Large enough to get about 4 in. (10 cm) square without including the inconsistency of the edges…..and need to be made with the same yarn and needles you will be using for your project.

In addition, specifically pertaining to stranded work, these swatches need to be worked in the round as gauge/tension can be different from knitting flat to knitting in the round. It has to do with getting a different gauge when knitting than when purling.

In an attempt to ease any “dreaded” aspects, think of the swatch as a way to test out any color changes from the designer’s choices…or to just see how the design looks in person before you work an entire garment.

Keeping all of this in mind, there are a few ways to finding tension for stranded work.

The first is a “swatch hat or cap”, a two-for-one solution made popular by Elizabeth Zimmerman and Meg Swansen.

With the yarn and needles you plan to use for your project, cast on a number of stitches equal to a multiple of the total stitch repeat of the largest motif used in your garment…and enough stitches for a hat.

So for example, if your largest motif has a 16 st repeat and the required gauge is 32 sts = 4 in. (10 cm) ...or 8 sts = 1 in. (2.54 cm)…and you want a hat that is approx. 21 in. (54.34 cm) in circumference, then you would cast on either 160 sts [20 in. (50.8 cm) and 10 repeats of the motif] or 176 sts [22 in. (55.88 cm) and 11 repeats of the motif].

The idea is to create something useful while also making something large enough to get a gauge/tension measurement.

The second gauge/tension measurement option is a flat swatch which is worked to simulate knitting in the round. Like the swatch hat, you cast on a multiple of the stitch repeat of the largest motif, except you do not need as many repeats. You will still need 4 in. (10 cm) not including the edges. This swatch is best worked on a circular needle.
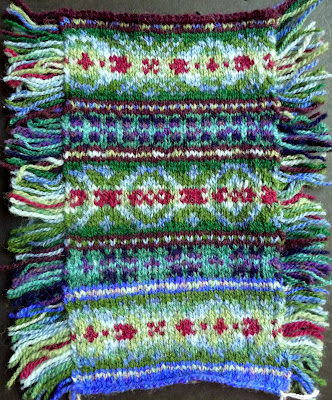
Eastlake flat swatch with early color trials...and not really large enough. :)
If you use the numbers above, 4 in. (10 cm) at 8 sts per 1 in. (2.54 cm) gives you 32 sts….which is exactly 2 repeats of the motif. Since you want to have 4 in. (10 cm) away from the edges, you’ll need to cast on 48 sts (16 sts x 3 repeats).

When you get to the end of the row, break yarn(s) and move the knitting to the other end of the needle…so the first stitch is once again on the left needle and the right side is facing. Continue in this manner until you have completed about 5 inches. Steam or wet block the piece and trim the yarns ends to 1 or 2 inches.

FYI, this is the swatch I use most of the time. As a designer, it gives me a record of what I have been working on…especially if I need to send the sample garment off to a yarn company or magazine.

You may have noticed, though, that both of these methods require purchasing extra yarn to have enough for both the hat or swatch AND the garment you are planning to make.

An alternative is the speed swatch which is produced almost exactly the same way as the flat swatch, except instead of breaking the yarn at the end of the row, the yarns are pulled back around in a giant loop to the first stitch. Make sure the pulled yarns are loose enough so the swatch will lay flat for measuring.

Melimoyu - speed swatch 
This type of swatch is perfect for those times when you are not sure you have enough yarn for a project. Since you never break the yarn, you can pull out the swatch and start your garment. My recommendation, though is to take a quick picture for future reference before you pull it out.

I use this method if I am working on a project where a limited amount of yarn has been sent to me to work on. I have been known to work up a sample swatch for a client, take a picture, and pull it out. Working this way, I can send a choice of two or three designs…before I start on a garment.

Ok, so now you have your gauge/tension measurements. What happens if what you measured does not match the gauge/tension in your pattern?

Adjusting for gauge is a fairly personal exercise because everyone knits a bit differently….meaning the stitch that is created is slightly different with every knitter. Some stitches are taller, some shorter…some fatter, some thinner.

There are a couple of possible solutions you can try, though. The first of which is to change needle size, but you probably have already tried this.

You may not have tried is to change to wooden needles. The wooden surfaces can provide a bit more friction than metal needles. More friction, more grab, changed stitch…and hopefully changed gauge.

Also, make sure you are moving your stitches from the tips of the needles. I am sure you all know this, but the tips of the needles have a smaller circumference than the main part of the needle. You want to give all of your stitches to opportunity to grow up to their fullest capacity…so push them on over to the main part of the needle as soon as they are “born”.

Another possible solution…and one I suggest in my patterns, is to work toward row gauge. Stitch gauge can be manipulated in blocking if you are not too far off.

You can also work to stitch gauge…then adjust the length as necessary. 

So that's it for this post. If you have any questions or gentle comments, please add them below.

Next week: Needles Used and Casting On.


Brandon Knitting Designs - website
Brandon Knitting Designs - Facebook
Ravelry - varianbrandon
Twitter - @vbknits
Pinterest - Varian Brandon
Instagram - varianbrandon

Tuesday, May 19, 2015

Stranded Knitting: Post 2 - Yarns Used and Fabric Created

Yarns Used…and Fabric Created

Criosanna swatch - front
Criosanna swatch - back
No matter what yarns are used, the fabric created by stranded knitting was, historically…and is at present…created as much for warmth, as it is for colorful patterning. This warmth can be attributed to the non-working yarn stranding across the back of the knitting, trapping air between the plies.

It follows, then, that the fabric created will be doubled in thickness…and that the thickness of the fabric is dependent on the thickness or weight of the yarn used. Additionally, as we think about the way it is created…with one strand looped into knitted stitches and another strand carried across the back…that the resulting fabric does not have as much “give” as fabric which is created with only loops made of a single yarn. Put another way…the result is slightly less stretchy. Which means, when choosing a size, there will be less negative ease to figure in.

But this style of knitting is primarily about color and color patterning. These patterns can be striking with the simplicity of two or three colors per garment.

Granted, the examples below are my designs, I use them because I do not have to worry about copyright, but you get the idea...

West at Heart Hat
Knights Banner Cowl
The patterns created with two colors per round can be equally beautiful with gradual changes in color resulting in what has been called a more “painterly” style.
Sandbar swatch
Blue Flame Cowl

Ninian swatch
The weight of yarns used can vary from the single ply, lightly processed, bulky weight Lopi yarns…to “sticky” fingering weight Shetland wool…to the silk yarn used in the oldest example of Fair Isle knitting in the Shetland Museum. Your gauge will obviously be different with different yarns…as will the thickness of the fabric created as mentioned earlier.

Due to the warmth created by a double thick fabric, most stranded work is created using fingering or DK weight yarn. However, as mentioned above, there are some exceptions. Some of these exception-ed and exceptional garments are created from intentional, knowledge-enhanced design decisions. The gorgeous worsted weight Scandinavian sweaters come to mind or the stunning Icelandic yoked patterns.

Some exceptions are blundered into with all of the knowledge (or lack thereof) of a newbie stranded knitter...namely me. :)

Expository tale: I once made a stranded cardigan vest (sleeveless cardi) for my father using several shades of worsted (Aran) weight wool...more than three colors per row at a fairly tight gauge/tension. I had seen a Bargello needlepoint pattern in some magazine...and for no other reason except I liked the pattern...decided it would be great for a sweater for Dad. When it was finally finished, I swear that thing would have deflected arrows! ...and was WAY too warm for the South Carolina climate where we were living. Consequently, my father loved it, but from afar...i.e. it never left his closet.

Dad's vest - front

Dad's vest - back

Moving on...

In a discussion of yarn selection, it must be said here that there are those who will insist that when recreating different stranded traditions, the knitter must use yarns inherent to that tradition. Granted, as a lover of history and long standing traditions, I can certainly understand this reasoning. However, some quite lovely stranded work has been created using non-traditional yarns.  Obviously, this style of knitting can technically be accomplished with any yarn. That being said, the sometimes complicated patterning of stranded knitting is best displayed worked in yarns which show off these motifs. Bottom line: “Hairy” novelty yarns should probably not be considered. Just saying.

So when selecting yarns, look for lines that have enough colors to suit your pattern needs.


Color is a wonderful glorious thing. It is one of the reasons we love stranded knitting, but original color selection and color substitution can be tricky. I have a couple of ideas about color selection, but since this series is primarily about technique, a discussion of color should probably be left for another post. (That’s two “other posts” now.)

Next Week: Gauge/Tension


Brandon Knitting Designs - website
Brandon Knitting Designs - Facebook
Ravelry - varianbrandon
Twitter - @vbknits
Pinterest - Varian Brandon
Instagram - varianbrandon

Monday, May 11, 2015

On the horizon - stranded shawl and stranded knitting discussion

Preliminary photos and no pattern written up yet...this is not an official pattern release yet...but wanted you guys to see what is most recently off of the needles.


I'm thinking of calling it Saluda Sunrise....because this is what we see most mornings.


Also, starting Tuesday, May 12...and hopefully every Tuesday for a while, I will be posting Stranded Knitting: a discussion which will cover some of the aspects of stranded knitting. I hope you will join me and add any gentle comments or questions you may have.

Looking forward to hearing from you.


Brandon Knitting Designs - Facebook
Ravelry - varianbrandon
Twitter - @vbknits
Pinterest - Varian Brandon
Instagram - varianbrandon


Friday, January 23, 2015

KKQ - the 10th year!

10 year cake. BTW...really good!
Ten years! We started out with 26 knitters in 2006. This year...106 knitters and quilters! Not too shabby for a retreat I wasn't sure would get off of the ground.
Group shot...not everyone. Who knew knitters and quilters were so camera shy?
I wish I could show you wonderful pictures of the retreat, but I was so busy, there was just no time to pull out a camera.

Actually, there were a few moments that I got it together enough to capture....

Tower of Textiles ready to be blessed at Sunday service.

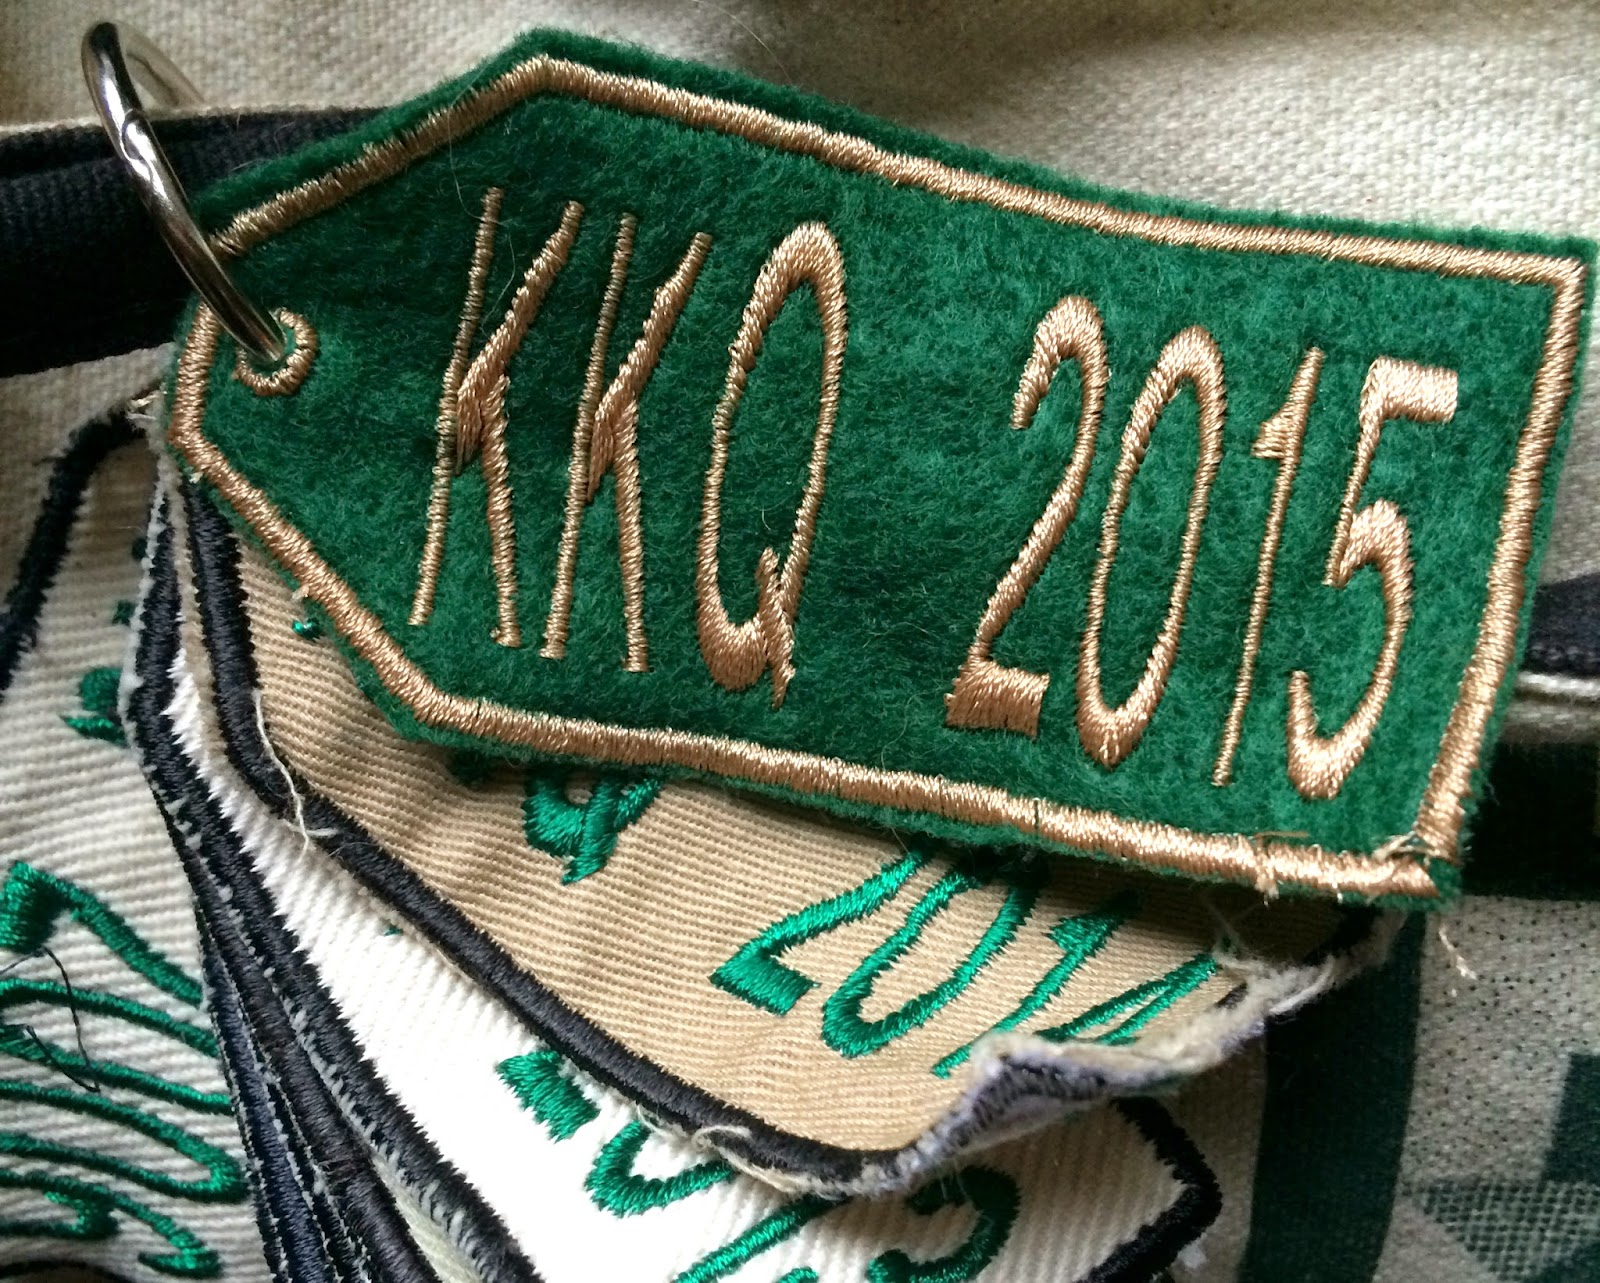
2015 KKQ badge...reversed colors for 10th year.
The rest you will just have to image for yourself...

A room full of people, knitting and talking, patiently waiting for the welcome speech (made by me) to be over so the retreat could begin.

The Kanuga Dining Hall ringing with birthday wishes (complete with harmony)....on three different occasions.

Evenings filled with knitters around big stone fireplaces.

Evenings filled with quilters happily sewing away in brightly lit Gooch Main.

Gorgeous quilts spread out at the Show and Mingle...and I mean gorgeous!

Gorgeous sweaters, shawls, and hats worn by knitters as they walked around the Kanuga campus.

Beautiful services filled with images of cloth and yarn.

Quiet moments of concentration over a new technique to be learned.

Joyous sounds of ah-ha moments...and the laughter of new and old friendships.

I could go on...but you get the picture.

Kanuga tells me they have a capacity of 400.  We're already planning for next year. Wish you'd join us...I think there'll be room. ;)


Brandon Knitting Designs - website
Brandon Knitting Designs - Facebook
Ravelry - varianbrandon
Twitter - @vbknits
Pinterest - Varian Brandon
Instagram - varianbrandon


Sunday, December 28, 2014

KKQ Preparation

Now that Christmas is over and 2015 is closing in on us, I am turning my attentions to a retreat that I coordinate in the mountains of Western North Carolina.

This January, participants at the Kanuga Knitting and Quilting retreat (KKQ) will meet at the Episcopal conference grounds near Hendersonville, North Carolina. Among those attending will be mothers and daughters, mothers and daughters-in-law, brothers and sisters, and good friends who for most of the year are separated by long distances. They come for the love of the mountains...and for the love of Kanuga. For opportunity to do something for themselves after a hectic holiday season...and to see friends they only see during this long weekend in January....but mostly they come for the company of friends who love to create with needles and yarn or fabric.


This January marks KKQ's tenth year...which seems remarkable to me. Yeah, I know we started in 2006 with 27 people and currently, we have over 100 participants registered...but the years have just gone by extremely fast.


At KKQ '15, there will be six knitting instructors and two quilting instructors...and each discipline offers something for all skill levels.

Most years I teach stranded/Fair Isle knitting. This year, I am giving a workshop on steeking. The project is a steeked cowl and includes instructions for a 3-color stranded version and a version with knit and purl stitches.


I call the class...No Alcohol Fortification Needed...since everyone seems to think you need to be heavily intoxicated to cut open a steek. Nothing could be further from the truth.

Anyway, the retreat is in a few weeks and I have spent the last few days putting my kits together for the class.


In less than three weeks, we will all meet again in front of the great stone fireplace at Kanuga for the tenth annual KKQ (January 15-19, 2015). Will you be there? It is not too late to join us this year...or maybe you would like to be part of the second decade of knitters and quilters at Kanuga in 2016. Hope so.


Brandon Knitting Designs - website
Brandon Knitting Designs - Facebook
Ravelry - varianbrandon
Twitter - @vbknits
Pinterest - Varian Brandon
Instagram - varianbrandon

Sunday, November 23, 2014

Criosanna: a tale of a transatlantic cardigan

Ok, people, I've finally done it now. I have finally reformatted Criosanna to my template and released it to Ravelry.


This sweater was designed in 2009 and presented to Jamieson & Smith for use in their pattern collections. There were some issues with the written pattern (hey, I was new!) and the garment was mailed back to me to fix. When things were sorted out, it was returned across the Atlantic.

After a bit, J&S emailed to ask permission to send the pattern (and the sweater) to a leading British knitting magazine. Boy, howdy!

Time went by...and I never heard from the magazine.

By now it was 2011 and my husband and I were in Shetland for the Tall Ships race. While visiting J&S, I asked about the sweater. Apparently, the magazine was going through a reorganization and communications were a bit spotty. The J&S sales manager suggested I try to contact the editor myself....maybe I would have better luck.

On our return to the states, I did just that. The new editor was familiar with the sweater...which apparently was sitting in her office with no identification tags. She wanted to use it for the new magazine. Boy...hmmmm...ok.

Time went by...and I never heard anything else from the magazine...

...until another editor emailed.

It seems the reorganized magazine didn't make it...and another publisher had bought them out. This new editor had inherited the sweater in the transition...and wanted it for the August 2012 edition. hmmmmm...ok.

Criosanna appeared in the August issue of Knitwise in 2012. Woo-hoo!

After the designated exclusivity time, the rights were returned to me...and in May of 2013...so was the sweater!

Now things get crazy on this end....that same month we moved to North Carolina. September 2013, we purchased a new home. October 2013, we closed on our old house in Atlanta.

So...finally...a little over a year later...I have gotten my act together to reformat Criosanna to my pattern template...and here it is!

Whew! It has been a long ride...but done...and done.

Varian

Brandon Knitting Designs
Brandon Knitting Designs - Facebook
varianbrandon - Ravelry
VBknits - Twitter


Friday, October 17, 2014

To Be Vertical or Horizontal....that is the question.

I have been swatching away....and trying a different color arrangement for the chart for the Elfin Tweed shawl project.

Here's the swatch....

The bottom motif is the original color placement. The top motif is the adjusted color placement.


I'm thinking I like the adjusted one best.

The next question...
Do the stranded work "stripes" go vertically or horizontally? In other words, when you are wearing the shawl, are there short stripes that stretch the width of the shawl...or do the stripes go from end to end length-wise? 

For the vertical version, the knitter would cast on the width's worth of stitches (approx. 200 sts) and work from side to side 

For the horizontal version, the knitter will cast on the length's worth of stitches (approx. 500 sts) work from end to end.

The more research I do, the more I think I like the horizontal option the best, in spite of casting on 500 sts. Then again...

Maybe I'll just think about it some more.....while I'm work on the border.

Varian
Ravelry: varianbrandon

Monday, October 13, 2014

This week on Elfin Tweed....

Elfin Tweed update...
(There will be a real name for this project...I promise.)

Previously on Elfin Tweed...

Step 1 - skeins

Since we last met, these skeins of Knit One, Crochet Too Elfin Tweed fingering weight (60% merino, 20% baby llama, 10% bamboo, 10% Donegal, 208 yards, 191 meters) became...
Step 2 - yarn cakes


Then I had a blast playing around with my source books and charting software and this swatch resulted.
Un-named Elfin Tweed project swatch 1

For the record...I kinda like the overall effect...but not sure about the exact color placement. Needle size - US 2 (2.75mm)....but I'm thinking I may go up to US 3 (3.25mm) or further for a bit more drape.

However, one of the reasons for a fairly dense fabric for color work is so the floats don't show from the back. So we'll see....

If you are wondering what the massive mess is at the bottom of the picture, I am swatching without breaking the yarn and just sliding from one end of the circular needles to the other which creates long floats across the back. This way I can make a number of swatches and still have enough to do the project.

So there you have it...yet to be named Elfin Tweed project...first swatch. What do you think?

Varian
brandonknittingdesigns.com
Ravelry: varianbrandon